
I want to share step-by-step how we built the beautiful wood coffered ceiling in the master bedroom. It completely transforms this room.

Here is the master bedroom many moons ago. Our coffered ceiling started with simple drywall.
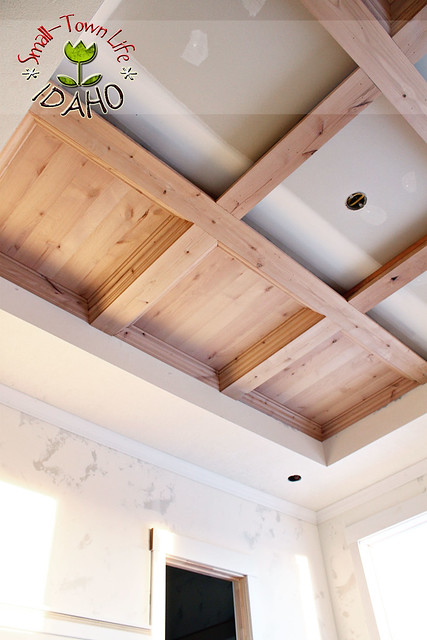
1.) Andrew first took 2x4's and created a grid pattern.
2.) Next, he took four-quarter knotty alder and nailed it over top of the 2x4's in the same grid pattern.
3.) Then using quarter-inch alder, he filled in all of the grids.
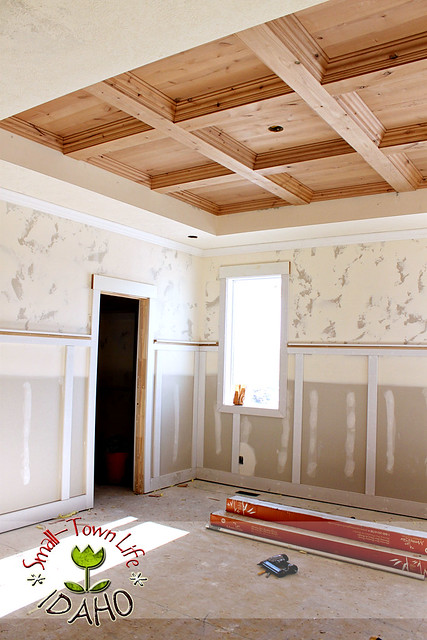
4.) To give it a finished look, Andrew wrapped each grid in crown.
5.) Then he used a maple-to-alder spray stain and a coat of lacquer.
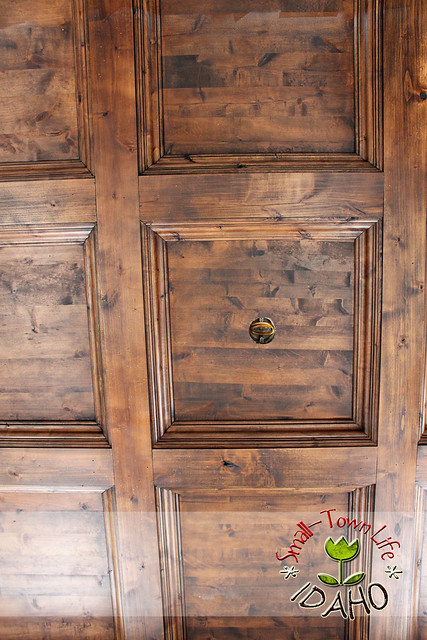
6.) Next, he used a water-based rusty old glaze that was wiped on and off. This is what caused the knots and grain patterns to pop.
7.) After letting it dry for 30 minutes, it was lacquered one more time.
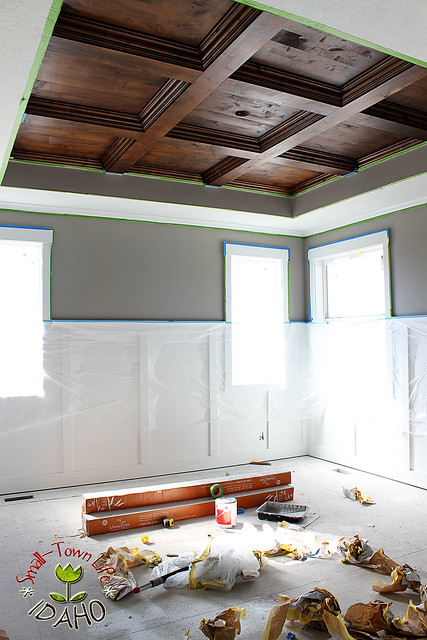
It was gorgeous, but it looked shockingly stark against the white walls. I was anxious to get everything taped and painted. If you notice, we painted the walls AND inside the coffer itself with the SW Pussywillow color.
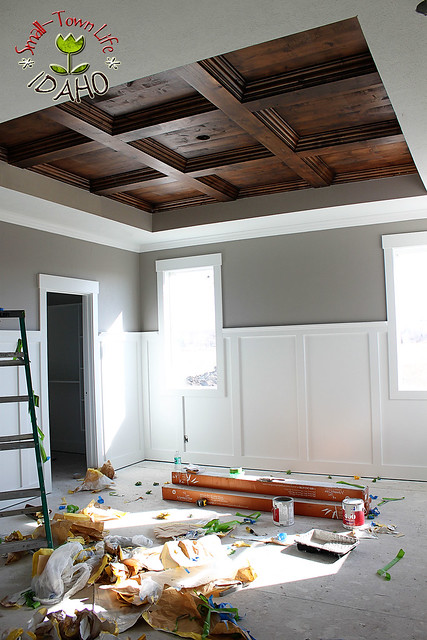
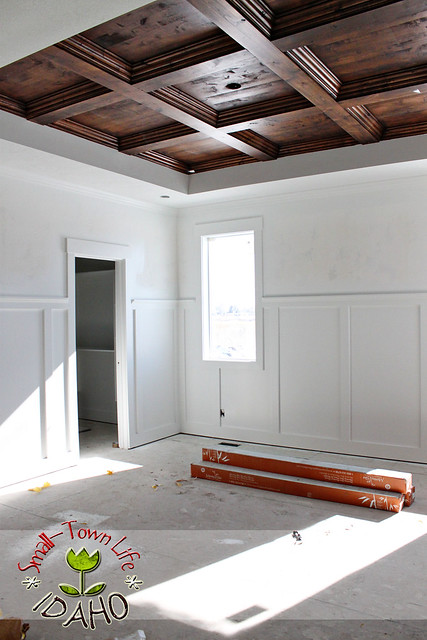
Here it is with the tape and plastic removed (and on the floor). It all looks more complete and gradual this way.
Second perspective.
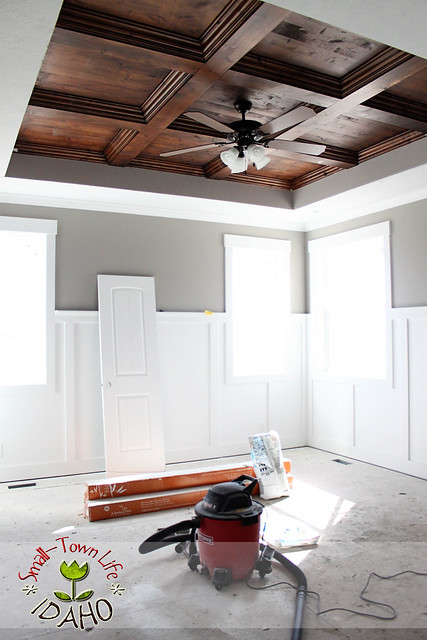
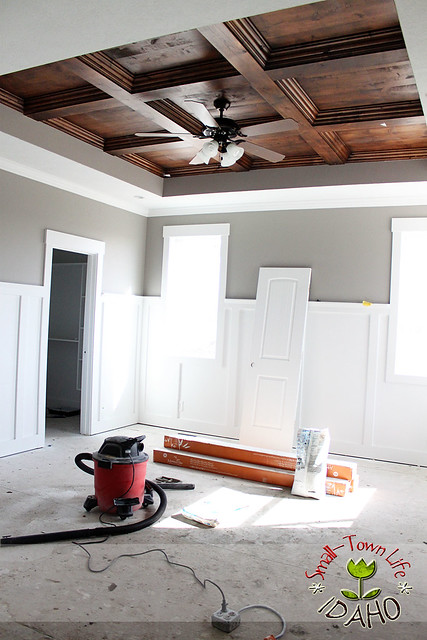
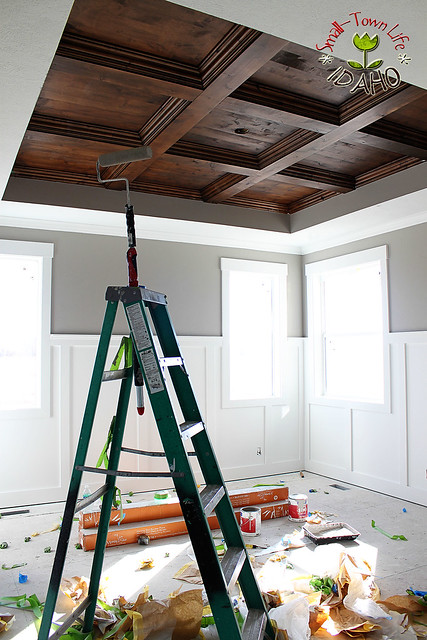
And finally, here it is finished with the ceiling fan in the center and the can lights installed along the outside edges of the coffer. This room is just waiting for carpet and vent covers!


44 comments:
Wow! That is SO beautiful!!!!
It is amazing! You and your husband are building such a beautiful home! ;)
This is absolutely gorgeous! Seriously this is what I want my dream home to look like. You did a fabulous job.
I've been wanting to do this in my living room, but in a shiny white color. Now I think the stained wood looks better. Thanks for sharing. Great job.
I'm featuring this on my website! It's gorgeous! You made my husband's jaw drop!
The ceiling looks fantastic. It looks like it has been there forever. Great job.
I just saw this on Ucreate - amazing job! Really beautiful and great work!
That is thee most beautiful thing I've seen all month. Maybe year!! I love it! Pinning, and thank you!
Oh, and also, I thought for a second you were going to paint the whole thing white and I was like, NOOOOOOOO! ;) not that it wouldn't be pretty white, but the contrast. . .
A-MAY-ZING!
One word... WOW! I would love to have something such as this in my home. Beautiful work.
I love it! It's beautiful! I can't wait to see all of your house. New Follower! You can visit me at http://raisingdieter.blogspot.com/
Shay
Oh my goodness! The ceiling is absolutely beautiful!!! I'm going to show this to my handy hubby! :)
Jill
This is amazing! You guys did fabulous work! I would love to feature this on my blog if your are ever interested please let me know!
Why oh why can't I pin this?? Amazing, Rachel. I just passed by your house just today to see how it was going... now I see this. My oh my. Beautiful.
That whole room is stunning and I think that Andrew is a keeper. So beautifully done!
Absolutely gorgeous! I love it!
I'm a new follower. ~Rachel (And my hubby's name is Andrew ;) )
Hi! I'm an Idaho girl too! (Boise, Twin Falls, Pocatello) I don't live there anymore though. I love this ceiling...my hubby did a similar one in our kitchen (we painted ours white). New follower - follow back at www.justhadabrightidea.blogspot.com
This is absolutely GORGEOUS!!!!!!
Great job!
Oh my goodness...this is beautiful. My husband and I have been talking about adding this to the dining room. Will definitely keep this in mind.
Gogeous! I just found your blog through remodelaholic and am a new follower. We are actually moving today into a home we just built so its great to see someone else's process as well (although we didn't do the work ourselves like you!)
Wow! Amazing ceiling. I wish my ceilings were high enough to do this. Our ceilings are only 8 feet so it would not work. I love the way yours looks.
Saw this on remodelaholic. Great great job. I am in love!!!
Bj
This looks awesome...I also love the paint color. Might just have to try that. Thanks for the post!
Saw this project over at Remodelaholic. Coffered ceilings give such a high-end look. And yours look superb! Loving the board and batten and your window trim, as well as the paint color on the wall. Gorgeous!
WOW, that is absolutely gorgeous!!
I just found this via pinterest and it's awesome. I really want to do this for my basement ceiling.
I will have this. I'm scheming now, and husband is laying on our bed studying the trey ceiling! Lolol
Such an amazing idea! I love the color that you chose to stain it. It looks so rich and gorgeous! Thanks for sharing the tips. We've wanted to try this out and you made it easy to follow along. Megan
What a stunning look - thanks so much for the step by step...I may have to try this out!!
I was wondering what stains you used, they are gorgeous!! Thanks!
Wow!! That is GORGEOUS!!
Beautiful ceiling, wainscoting and colors. But why do all that amazing work and install a cheap ugly ceiling fan?
What is the brand of the glaze u call water based rusty old glaze? Love how it makes it look worn? Love the paint color also.
To above anon:
Wats ur problem?
This is great! Is the four quarter he used on top of the 2x4s the same width? It looks to be slightly wider but I can't tell for sure. Thank you!
In one word: YUM!!! It couldn't be more gorgeous. Great job!
you break it down so simply! looks gorgeous:)
That is badass !!! Grrrrreat job Andrew
LOVE THE CEILING, IT TURNED OUT GORGEOUS, I WOULD LOVE TO FEATURE IT, IF THAT WOULD BE OK PLEASE LET ME KNOW
LAUREN
I ran across this page a while back while looking for ideas and saved it, as I am remodeling my house. I have been working on doing the hall for the last three days. My hat goes off to your husband. Im 40 yrs old, and 6'2 260 lbs, I didn't see the pic of him until about the tenth time I looked back to find this blog. My body hurts! I enjoy a challenge, and Ive done a lil bit of crown before. This just makes it more confusing. I alternated btw light and dark stain, and my boards are cedar. It looks great so far, I just cant make up my mind which side to put the top of the crown on. Which, males it quadruple confusing... Your hubby is a talented man my dear. Thanks for the idea. My wife loves it, I just don't know if I'm up to doing the den lol Thx again
how much did it cost all said and done?
My wife and I live down in Twin Falls and I came across this on pintrest, and both my wife and I fell in love with it. I am going to do this in our master bedroom. I did have a few questions though, I can not find anything on the "water-based rusty old glaze", as in where to get it and what exactly it is called. If you could let me know the brand and name of the stain used as well as the glazed mentioned above I would greatly appreciate it. Love all of your work that you have put into your home! Great job! If email works better you can reach me at choskins53@aol.com.
This is AWESOME! This looks like its in my line of skills and will give added value to our house.
This is very beautiful!
Where did you get the lumber needed for this project? Also, can you explain a bit more about the very first step? How did you stack the boards? I can't get a clear understanding or picture of how they are stacked. I'm very new to this but I'd like to do this in my home. I'd appreciate any help you can provide me. Thanks so much!
can you please tell me how high your ceilings are?
Post a Comment